In this post today, I’ll walk you through the Arduino Pro Mini in detail. I’ll cover each and everything related to Arduino Pro Mini including What is Arduino Pro Mini, pinout, pin description, how to program it, and applications.
Arduino boards are the electronic development boards used in embedded systems, automation, robotics, and other electronic projects. Arduino provides both software and hardware platforms for non-tech people who fear developing electronic circuits from the get-go. Arduino is an open-source platform which means you only need to pay for the board and you can program these boards free of cost using Arduino IDE software. Plus help from the Arduino community is readable available i.e. if you find any difficulty in designing and developing your boards, you can get help online without even paying a penny.
What is Arduino Pro Mini?
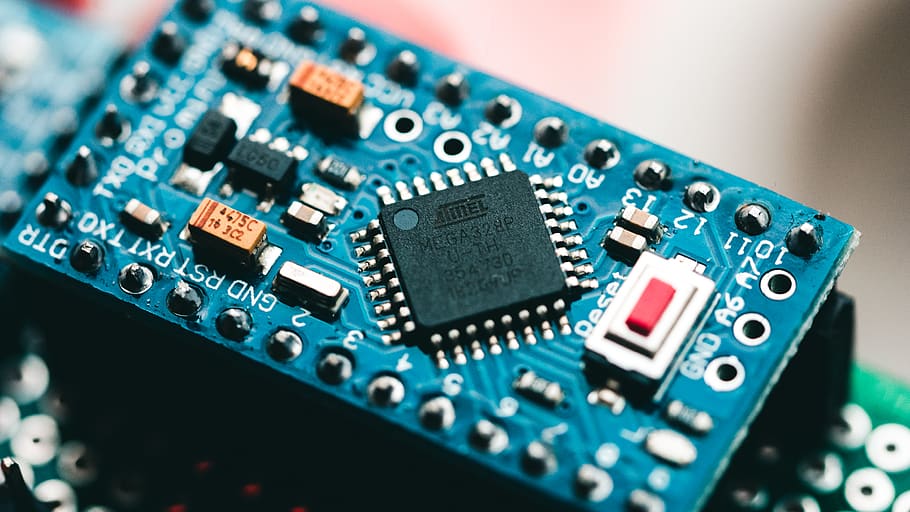
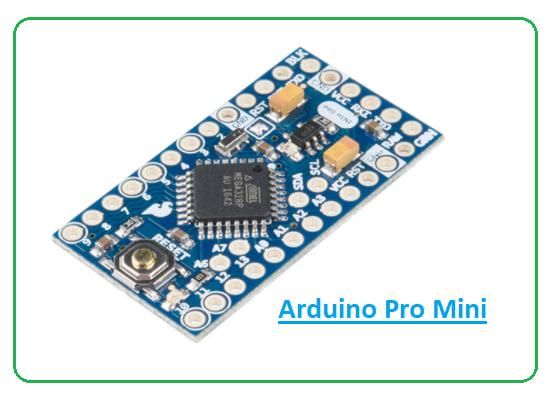
Arduino Pro Mini is a small, compact, open-source development board based on the Atmega328 microcontroller.
This board is available in two versions i.e. one runs at 5V with 16MHz clock frequency while the other runs at 3.3V with a clock frequency of 8MHz.
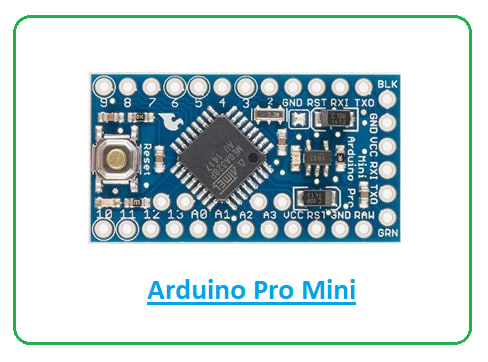
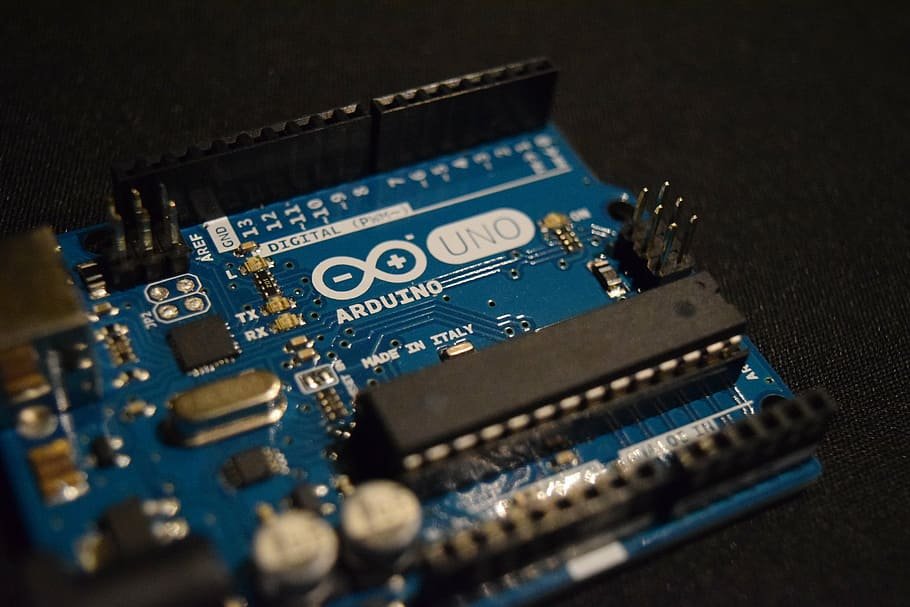
This unit is almost similar to the Arduino Uno board but comes in small size and doesn’t include a USB port and built-in programmer. Moreover, there are two voltage regulators on Arduino UNO while Arduino Pro Mini features only one voltage regulator.
Arduino Pro Mini features 14 digital I/O pins of which 6 are used for PWM output and 8 analogue pins are incorporated on the board that labels from A0 to A7.
The board comes with a built-in LED connected to pin 13 plus it also includes a reset button which is used to reset the board.
The flash memory of the controller is 32KB (of which 0.5KB is used for the Bootloader) which is used to store the code while EEPROM is 1KB and SRAM is 2KB.
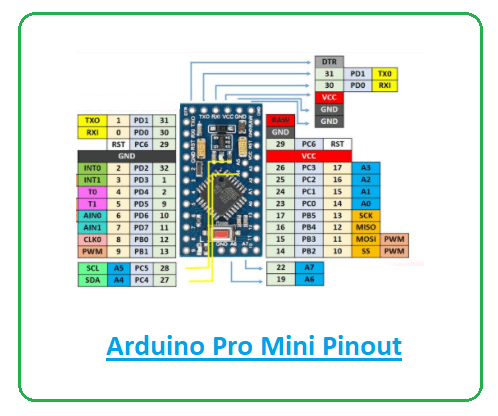
Arduino Pro Mini Pinout:
The Arduino Pro Mini is very small in size which means it is a right match for projects that require less space and fewer GPIO pins.
The following figure shows the pinout diagram of Arduino Pro Mini.
Arduino Pro Mini Pin Description:
Now you’ve got a little intro about Arduino Pro Mini. In this section, we’ll discuss the pin description of each pin available on the board.
Digital I/O Pins: you’ll find 14 digital I/O pins on board that is used for the connection with external components.
Analog Pins: 8 analogue pins are available on the board which can measure the voltage from 0 to 5V.
PWM Pins: 6 PWM pins are incorporated on the board which can control the speed of the motor of the brightness of the LED.
Reset Pins: 2 reset pins are available on this unit. These pins are useful to reset the board if your code hangs up in the middle of a running program. Providing LOW value to these pins will reset the board.
Vcc: 2 Vcc pins are incorporated on the board which provides regulated voltage i.e. 5V or 3.3V based on the board you’re using.
GND: 3 ground pins are available on this device.
Programming Header: FTDI six-pin programmer is incorporated on board which is used to upload the code into the controller.
External Interrupts: Two external interrupts (also known as hardware interrupts) are available on the board. There are marked as T0 at pin 4 and T1 at pin 5.
USART: The board comes with USART serial communication protocol that carries two pins RX and TX. The RX pin is used to receive serial data while the TX pin is the transmission pin used to transmit serial data.
SPI Communication: The unit supports the SPI communication protocol in which four pins 10(SS), 11(MOSI), 12(MISO), and 13(SCK) are used to carry out this communication.
I2C Communication: The boards also support I2C communication that comes with two pins SDA and SCL. The SDA is a serial data pin used to carry data while SCL is a serial clock line used for data synchronization clock.
Arduino Pro Mini Vs Other Arduino Boards
- Most of the Arduino boards come with a USB port that is used to send the program from the computer to the board. However, in the case of Arduino Pro Mini, all of the USB circuitry is removed to make it as compact and small as possible. You can program the board using a USB to serial converter cable. The FT232RL USB serial module is very handy and preferable for programming this board. A six-pin FTDI header can be connected to a USB to serial converter that provides the USB power.
- If you have already worked on the Arduino Uno board, then no need to buy a USB to serial converter cable as you can program the Pro Mini using Uno board. Make sure, the Pro Mini version you are working on comes with 5V regulation as it runs at 16MHz like Arduino Uno board. Programming your 3.3V Pro Mini board will not be compatible with the Arduino Uno board, hence making it very difficult to program the 3.3V version of the Pro Mini board.
- The form factor is another major difference that makes this device unique.
- Pro Mini comes in a very small and compact size which makes this device suitable for most applications. But small size comes with one limitation i.e. it doesn’t compatible with Arduino Shields unless you hard-wire the board with Arduino Shield.
How to Program Arduino Pro Mini:
This board is programmed using Arduino IDE (integrated development environment) software which is an official software introduced by Arduino.cc to program all Arduino boards.
You’ll find a USB interface in most of the Arduino boards available in the market, however, the USB interface is removed from Arduino Pro Mini to keep it small in size. The board supports a USB to serial converter cable through which you can transfer the code into the board.
The FT232RL USB serial module is commonly used to program this unit. A six-pin FTDI header provides USB power that can be attached to a USB to serial converter.
Unlike other Arduino boards, this small device is not compatible with Arduino Shields. However, the small size of this unit makes it a suitable pick for projects where project space is highly concerned as it can be placed in hard-to-reach places.
The board comes with a built-in Bootloader which means you don’t require an external burner to burn the code inside the controller.
Arduino Pro Mini Applications:
The Pro Mini board is a bit different than other Arduino boards available. As it comes with a small size and doesn’t include a USB interface and there is only when voltage regulator available on the board. The following are the main applications of Arduino Pro Mini.
- The unit is widely used for embedded and automation projects.
- It can be incorporated in IoT projects and display systems.
- The Arduino Pro Mini is commonly employed for semi-permanent installation in objects.
- The board doesn’t feature pre-mounted headers, which means you can connect various types of connectors based on the requirement.
Hey people!!!!!
Good mood and good luck to everyone!!!!!
I like this blog it’s a master piece!